|
|
SophiaFramework UNIVERSE 5.3 |
To test an application on the BREW device, it is necessary to set the license code at the
*license = "heap://"
statement in the SFCApplet::Boot function.
Example 2.5. SFCApplet::Boot function: before setting the license code
// Boot Loader
SFCApplet::FactorySPP SFCApplet::Boot(AEECLSID id, SFXAnsiStringPtr license)
{
    *license = "heap://";

    return (id == AEECLSID_HELLOWORLD) ? (&HelloWorld::Factory) : (null);
}
Example 2.6. SFCApplet::Boot function: after setting the license code
// Boot Loader
SFCApplet::FactorySPP SFCApplet::Boot(AEECLSID id, SFXAnsiStringPtr license)
{
    *license = "heap://"
      "TIXDRQXNU5WHU8Y3Z9WOHWQR6Z3VPSDHDV5CR1S4XASPWLUHWAS7Z5Z2TGS3XMSAT3UPUQTLTARCYPSF"
      "UEJZ6ROSJWGUQSEYKR6V2U4VESMTQLHKZ6X7Y2VKXHWIX3XBU0Z7VHWHXIZBSGT5SPU3XLX0Z1Y4R3TC"
      "U6WGT9WHWIVNYHYCUCR9T3SMTEWPRNVAX1Y4VPW2YCY9YQV5R7Z9UIVHT6SDUPU2SIW6VCRCWBR2S4WQ"
      "UPYFWCYGT4VIT1WHXGYPTQSFYPWNV3ULRNWFW7RBRFVKUKS2YQSQYHW1TPUPXBZ6UEY2WOYKR7S3TAU4"
      "TQS6UHVFVEVLU3R5SDSKW7RPTNTPVQU2T4R8Z4VLUGEW3U98TLDR8/";

    return (id == AEECLSID_HELLOWORLD) ? (&HelloWorld::Factory) : (null);
}
![[Note]](images/note.png) |
License Code |
|---|---|
|
"TIXDRQXNU5WHU8Y3Z9WOHW .................. U2T4R8Z4VLUGEW3U98TLDR8/" is the license code for HelloWorld application. The license code must correspond to the ClassID for application. As the license code is very long and can be splitted by using the double quotation marks, it is usually written in multiple lines like the above. | |
![[Caution]](images/caution.png) |
Testing on the BREW Simulator |
|---|---|
|
You do not need to modify the following code in the SFCApplet::Boot function when testing an application on the BREW simulator. *license = "heap://"; | |
In case of using RVCTB 1.2, Visual Studio Add-ins automate the process of creating a makefile and building an application.
In case of using other development environments, you have to create a makefile and build manually.
See the each sections for how to create makefiles,
Makefile of RVCTB 3.0, Makefile of GNUARM 4.1.1, Makefile of YAGARTO 4.4.2.
STEP 1. Confirm or Set up the Add-ins of Visual C++
Confirm two kinds of add-in icons on the tool bar of Visual Studio.
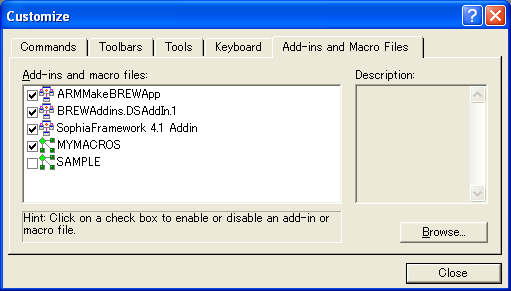
If the above add-in icons cannot be confirmed, click [Tools], choose [Customize], and check [ARMMakeBREWApp] and [SophiaFramework UNIVERSE Addin] in the [Addins and Macro files] tab.
|
Note |
|---|---|
| |
STEP 2. Generate and Edit the Makefiles
1. Click the [ARM MAK] icon on the tool bar, and then the makefile "HelloWorld.mak" is generated.
2. Click the [SF MAK] icon on the tool bar, and then the makefile "HelloWorld.mak" is updated.

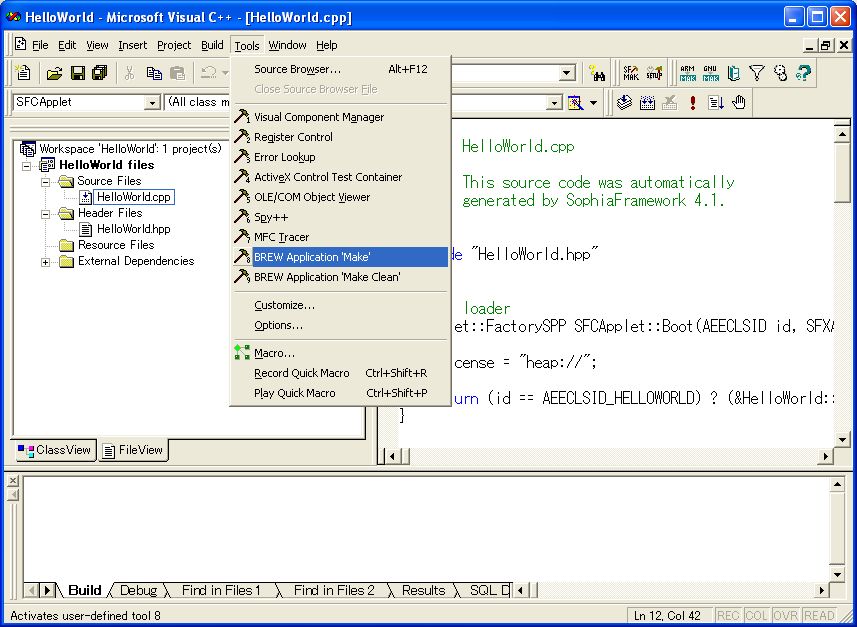
STEP 3. Build the executable file "HelloWorld.mod" for the BREW Device
With Visual Stidio, click [Tool], choose [BREW ARM Make], and generate the executable file "HelloWorld.mod" for the BREW device.
|
If the project has been changed |
|---|---|
If the application is saved in the directory other than the SophiaFramework UNIVERSE home folder, its makefile paths to SophiaFramework UNIVERSE libraries and include files must be modified. | |
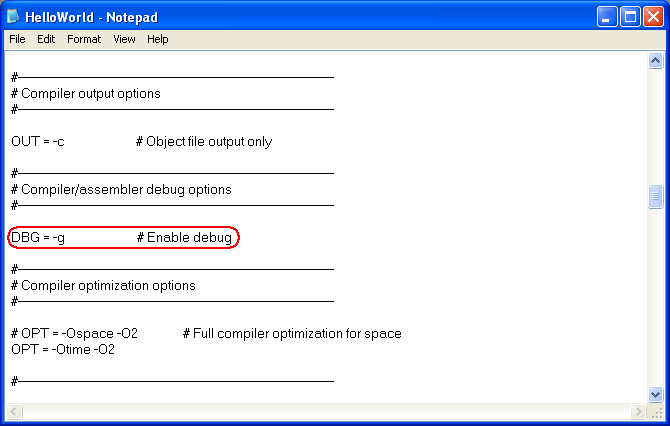
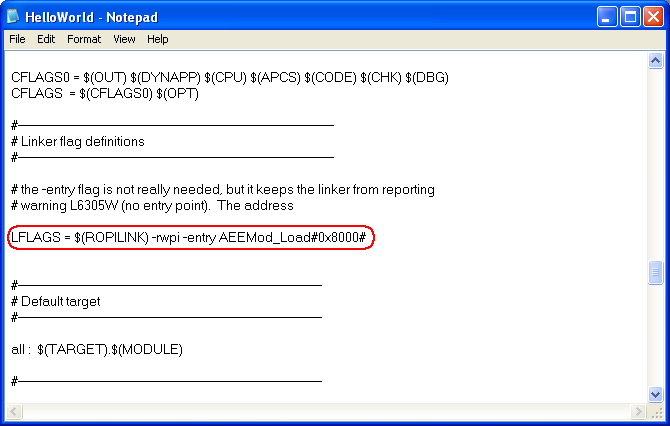
Since the addin of SophiaFramework UNIVERSE does not support RVCTB 3.0, it is necessary to create your own makefile by yourself.
A typical makefile template is available at this site.
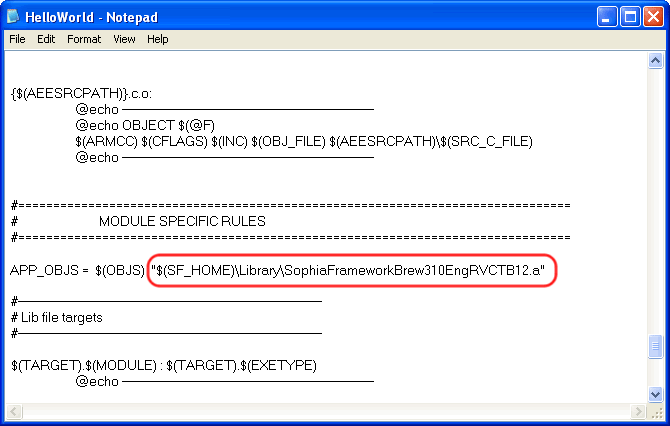
Set the TARGET variable, the OBJS variable, and the dependent list in the makefile if necessary.
You can use values generated by the BREW addin for setting these values.
Example 2.8. Example/chelloworld applet
# ... (ommited) ...

TARGET      = chelloworld
OBJS        = chelloworld.o

# ... (ommited) ...

# link SophiaFramework library for BREW SDK 4.0
# if BREW SDK 4.0, change into SophiaFrameworkBrew400EngRVCTB30.a
LIBS        = "$(SF_HOME)\Library\SophiaFrameworkBrew310EngRVCTB30.a"

# ... (ommited) ...

# --------------------------------------------
# DEPENDENCY LIST, DO NOT EDIT BELOW THIS LINE
# --------------------------------------------

chelloworld.o:  chelloworld.cpp
chelloworld.o:  chelloworld.hpp
chelloworld.o:  chelloworld.bid
Example 2.9. Example/chelloworld applet in the Thumb code
# ... (ommited) ...

TARGET      = chelloworld
OBJS        = chelloworld.o

# ... (ommited) ...

# build applet with the Thumb mode
ARMCPP      = "$(ARMBIN)\tcpp"

# ... (ommited) ...

# link SophiaFramework library for building with the Thumb mode
LIBS        = "$(SF_HOME)\Library\SophiaFrameworkBrew310EngRVCTB30Thumb.a"

# ... (ommited) ...

# --------------------------------------------
# DEPENDENCY LIST, DO NOT EDIT BELOW THIS LINE
# --------------------------------------------

chelloworld.o:  chelloworld.cpp
chelloworld.o:  chelloworld.hpp
chelloworld.o:  chelloworld.bid
Since the addin of SophiaFramework UNIVERSE does not support GNUARM, it is necessary to create your own makefile by yourself.
A typical makefile template is available at this site.
Set the TARGET variable, the OBJS variable, and the dependent list in the makefile if necessary.
You can use values generated by the BREW addin for setting these values.
Example 2.10. Example/chelloworld applet
# ... (omitted) ...

TARGET      = chelloworld
OBJS        = chelloworld.o

# ... (omitted) ...

# link SophiaFramework library for BREW SDK 3.1
# if BREW SDK 4.0, change into -lSophiaFrameworkBrew400EngGNUARM41
LIBS        = -lSophiaFrameworkBrew310EngGNUARM41 -lgcc

# ... (omitted) ...

# --------------------------------------------
# DEPENDENCY LIST, DO NOT EDIT BELOW THIS LINE
# --------------------------------------------

chelloworld.o:  chelloworld.cpp
chelloworld.o:  chelloworld.hpp
chelloworld.o:  chelloworld.bid
Example 2.11. Example/mathematicsexplainer applet which uses mathematical functions
# ... (omitted) ...

TARGET      = mathematicsexplainer
OBJS        = mathematicsexplainer.o

# ... (omitted) ...

# add include path for mathematical function library included in GNUARM
LIBDIRS     = -L"$(GCC_LIBPATH)\interwork" -L"$(GCC_HOME)\arm-elf\lib\interwork" -L"$(SF_HOME)\Library"

# ... (omitted) ...

# link mathematical function library included in GNUARM (never change order of specified libraries)
LIBS        = -lSophiaFrameworkBrew310EngGNUARM41 -lm -lgcc -lc

# ... (omitted) ...

# --------------------------------------------
# DEPENDENCY LIST, DO NOT EDIT BELOW THIS LINE
# --------------------------------------------

mathematicsexplainer.o: mathematicsexplainer.cpp
Example 2.12. Example/mathematicsexplainer which uses mathematical functions in the Thumb mode
# ... (omitted) ...

TARGET      = mathematicsexplainer
OBJS        = mathematicsexplainer.o

# ... (omitted) ...

# build applet with the Thumb mode
TARG        = -mthumb

# ... (omitted) ...

# add include path for the Thumb mode
LIBDIRS     = -L"$(GCC_LIBPATH)\thumb\interwork" -L"$(GCC_HOME)\arm-elf\lib\thumb\interwork" -L"$(SF_HOME)\Library"

# ... (omitted) ...

# add linker option for the arm/thumb interworking
LINK_CMD    = -script $(LINKERSCRIPT) --gc-sections --emit-relocs --stub-group-size=2 --pic-veneer -o

# link SophiaFramework library for building with the Thumb mode
LIBS        = -lSophiaFrameworkBrew310EngGNUARM41Thumb -lm -lgcc -lc

# ... (omitted) ...

# --------------------------------------------
# DEPENDENCY LIST, DO NOT EDIT BELOW THIS LINE
# --------------------------------------------

mathematicsexplainer.o: mathematicsexplainer.cpp
Since the addin of SophiaFramework UNIVERSE does not support YAGARTO, it is necessary to create your own makefile by yourself.
A typical makefile template is available at this site.
Set the TARGET variable, the OBJS variable, and the dependent list in the makefile if necessary.
You can use values generated by the BREW addin for setting these values.
Example 2.13. Example/chelloworld applet
# ... (omitted) ...

TARGET      = chelloworld
OBJS        = chelloworld.o

# ... (omitted) ...
# link SophiaFramework library for BREW SDK 3.1
# if BREW SDK 4.0, change into -lSophiaFrameworkBrew400EngYAGARTO44
LIBS        = -lSophiaFrameworkBrew310EngYAGARTO44 -lgcc

# ... (omitted) ...


# --------------------------------------------
# DEPENDENCY LIST, DO NOT EDIT BELOW THIS LINE
# --------------------------------------------

chelloworld.o:  chelloworld.cpp
chelloworld.o:  chelloworld.hpp
chelloworld.o:  chelloworld.bid
Example 2.14. Example/mathematicsexplainer applet which uses mathematical functions
# ... (omitted) ...

TARGET      = mathematicsexplainer
OBJS        = mathematicsexplainer.o

# ... (omitted) ...

# add include path for mathematical function library included in YAGARTO
LIBDIRS     = -L"$(GCC_LIBPATH)\interwork" -L"$(GCC_HOME)\arm-elf\lib\interwork" -L"$(SF_HOME)\Library"

# ... (omitted) ...

# link mathematical function library included in YAGARTO (never change order of specified libraries)
LIBS        = -lSophiaFrameworkBrew310EngYAGARTO44 -lm -lgcc -lc

# ... (omitted) ...

# --------------------------------------------
# DEPENDENCY LIST, DO NOT EDIT BELOW THIS LINE
# --------------------------------------------

mathematicsexplainer.o: mathematicsexplainer.cpp
Example 2.15. Example/mathematicsexplainer which uses mathematical functions in the Thumb mode
# ... (omitted) ...

TARGET      = mathematicsexplainer
OBJS        = mathematicsexplainer.o

# ... (omitted) ...

# build applet with the Thumb mode
TARG        = -mthumb

# ... (omitted) ...

# add include path for the Thumb mode
LIBDIRS = -L"$(GCC_LIBPATH)\thumb\interwork" -L"$(GCC_HOME)\arm-elf\lib\thumb\interwork" -L"$(SF_HOME)\Library"

# ... (omitted) ...

# add linker option for the arm/thumb interworking
LINK_CMD  = -script $(LINKERSCRIPT) --gc-sections --emit-relocs --stub-group-size=2 --pic-veneer -o

# link SophiaFramework library for building with the Thumb mode
LIBS    = -lSophiaFrameworkBrew310EngYAGARTO44Thumb -lm -lgcc -lc

# ... (omitted) ...

# --------------------------------------------
# DEPENDENCY LIST, DO NOT EDIT BELOW THIS LINE
# --------------------------------------------

mathematicsexplainer.o: mathematicsexplainer.cpp
If the created makefile is "chelloworld.mak" and the applet folder is "chelloworld",
execute the following command at the command prompt.
cd chelloworld
nmake /f chelloworld.mak
If the execution file for mobile phone "chelloworld.mod" is created, it is success.
|
execution path of the nmake command |
|---|---|
To use the nmake command, it is necessary to add the environment variable "PATH" with the execution path of "nmake.exe" included in Visual Studio C++. | |
|
Build with Visual Studio Add-ins |
|---|---|
In case of RVCTB 1.2, Visual Studio add-ins can build an applet. | |
|
Copyright(c) 2002 - 2024 Sophia Cradle Incorporated All Rights Reserved. |
|